A
4" tall amigurumi of a little owl. The pattern is available on Ravelry or you can find it written below. If
you have any questions, feel free to email me at icrochetthings@gmail.com.
Materials:
▪ Worsted weight yarn in brown, cream, white, yellow
▪ E hook (3.50 mm)
▪ Stuffing
▪ 9 mm safety eyes
▪ Scissors
▪ Tapestry needle
Difficulty: Easy
You should know how to work in the round, increase, and decrease.
Pattern:
This is an
icrochetthings original pattern © 2014-2016. Do not claim as your own. Do not
copy, sell, or distribute this pattern. Do not sell any products made from this
pattern.
2 Eye Patches
Starting
with cream
1. ch
2, 6 sc in 1st ch (6)
2. [inc] around (12)
F/O,
leave long tail for sewing
Body
Starting
with brown
1. ch
4, [sc] across, working on the opposite side of the chs: [sc] across (6)
2. [inc]
around (12)
3. [sc, inc] around (18)
4. [2 sc, inc] around (24)
5. [sc] around (24)
6. [3
sc, inc] around (30)
7. [sc] around (30)
8. [4 sc, inc] around (36)
9 – 20. [sc]
around (36)
21. [4
sc, dec] around (30)
22. [3
sc, dec] around (24)
Before
attaching the safety eyes to the body, push the eyes through the center of the
eye patches
Stuff
and attach safety eyes (I placed mine between rounds 10 and 11 at about 10 sts
apart)
23. [2
sc, dec] around (18)
24. [sc, dec] around (12)
25.
[dec] around (6)
F/O,
sew shut
2 Ear Tufts
Starting
with brown
1.
ch 2, 5 sc in 1st ch (5)
2. 4 sc, inc (6)
3. 5 sc, inc (7)
4. 6 sc, inc (8)
F/O,
leave long tail for sewing
Beak
Starting
with yellow
1. ch
2, 4 sc in 1st ch (4)
2. [sc] around (4)
F/O,
leave long tail for sewing
2 Wings
Starting
with brown
1. ch
2, 6 sc in 1st ch (6)
2. [sc,
inc] around (9)
3 – 5. [sc]
around (9)
Stuff
6. Fold
in half and [sc] across (4)
F/O,
leave long tail for sewing
Belly Patch
Starting
with white
1. ch 2, 6 sc in 1st ch (6)
2. [inc] around (12)
3. [sc,
inc] around (18)
4. [2
sc, inc] around (24)
5. [3
sc, inc] around (30)
F/O,
leave long tail for sewing
2 Feet
Starting
with yellow
1. ch
2, 5 sc in 1st ch (5)
2 – 3. [sc] around (5)
F/O,
leave long tail for sewing
Assembly
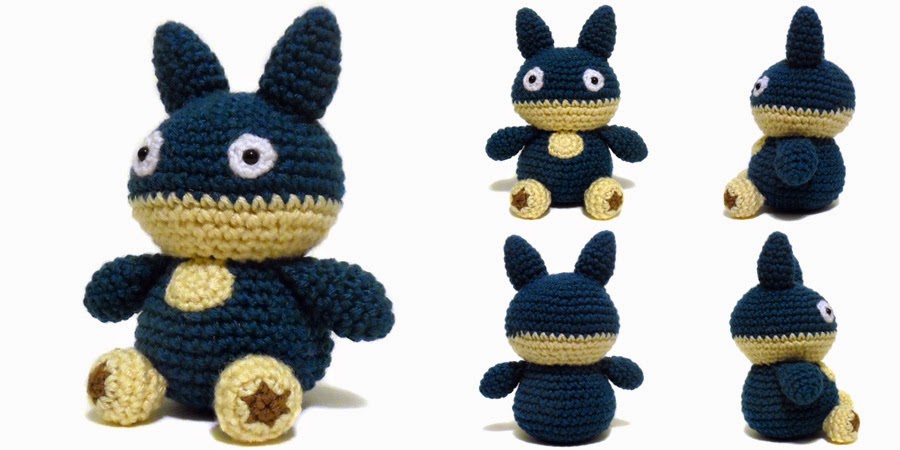
See pictures above if you need help with placement
▪
Sew the eye patches onto the body
▪
Sew the ear tufts on either side of the body, stuffing as you go
▪
Sew the belly patch onto the front of the body
▪
Sew the beak onto the front of the body
▪
Sew the wings on either side of the body
▪
Sew the feet onto the bottom of the body
▪
Use brown yarn to embroider 5 “v” shapes onto the belly patch